Body-Fit Ergonomic Chairs: 7 Tweaks for All Sizes
By Owen McKay • 3rd Oct
Let’s cut through the noise: most people struggle with ergonomic chair setups because they’re forced into a 'one-size-fits-most' illusion. I’ve seen it firsthand (remote workers wincing through Zoom calls, startup teams battling sciatica after their first funding round). The truth? A modern office task chair isn’t about perfection. It’s about confidence with your controls. When you dial in small, intentional tweaks, they compound into game-changing comfort. Think of it like my chaotic Monday rollout years ago: twelve people, twenty minutes, thigh clearance mapped, tilt tension set. Two weeks later? Happier shoulders and fewer break tickets. Small fit tweaks compound into big comfort and focus dividends.
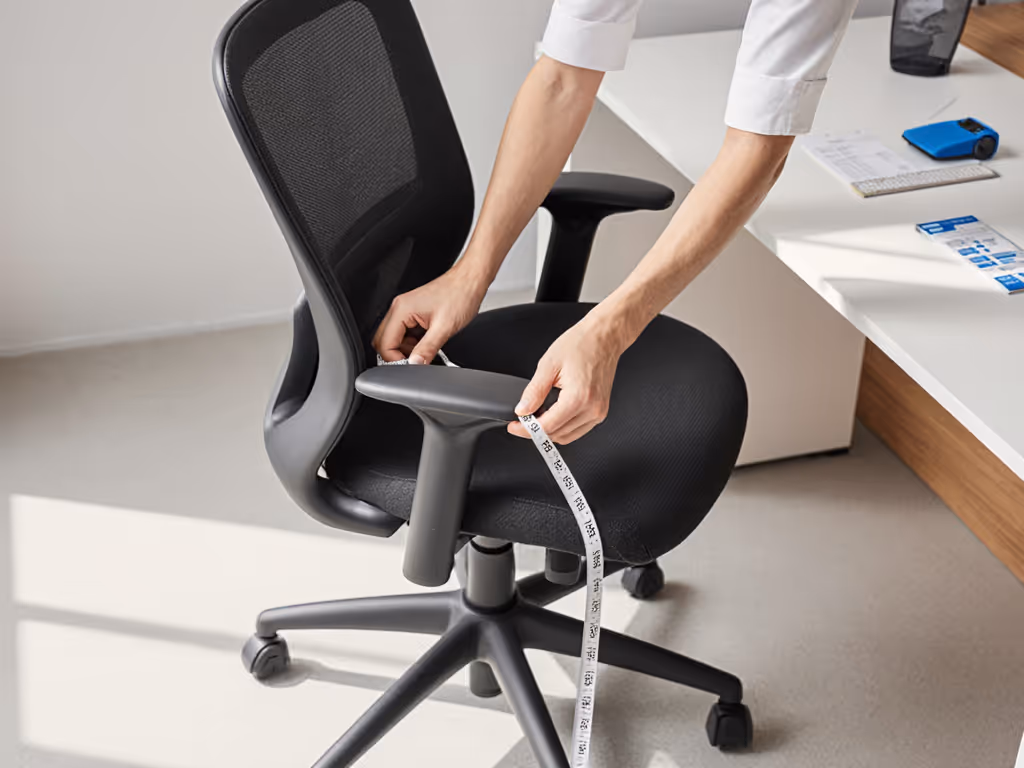
Today, we’ll tackle seven stepwise adjustments that work whether you’re 5'2" or 6'5", 120 lbs or 250 lbs. No jargon, no shaming, just actionable precision for your unique frame. Grab your chair and a tape measure. For a deeper step-by-step, see our chair adjustment guide. You’ll reclaim control in under 10 minutes.
1. Nail Your Seat Depth (The 2-4 Inch Rule)
Why it matters: Seat depth makes or breaks thigh support. Too deep? You’ll slide forward, losing lumbar contact. Too shallow? Pressure piles on your sit bones. This is critical for seating for petite individuals and tall users alike.
Your 90-second fix:
- Sit back fully against the backrest
- Check space behind knees: 2-4 inches is ideal
- Adjust lever or knob (often under seat front) until you hit that gap
- Pro tip: If depth adjustment is limited, tilt seat edge slightly downward (waterfall style) for pressure relief
Remember: Your chair shouldn’t hug your knees. It should hug your sit bones.
2. Match Lumbar Height to Your Spine Curve
Why it matters: Generic lumbar pads often hit too high or low, causing upper back strain. Petite users get shoulder tension; tall users lose lower support. Precision here prevents all-day ache.
Your 60-second fix:
- Locate your natural lumbar curve (make a fist, slide it into low back while standing)
- Adjust lumbar height (via knob or slider) so pad centers right there
- For fixed lumbar (common in mesh office chairs), scoot hips slightly forward until pressure feels even
3. Calibrate Armrests for Keyboard Real Estate
Why it matters: Armrests too high = shoulder shrugs; too low = wrist extension. This is where office chairs for tall desk setups often fail if users don’t adjust.
Your 45-second fix:
- Rest elbows on armrests while typing
- Shoulders should stay relaxed (no hiking!)
- Adjust height so elbows form a 90-110° angle
- Then set width: arms should rest comfortably parallel to torso (no pinching)
Set it, then move to typing, your shoulders will thank you before lunch.
4. Tune Tilt Tension to Your Weight
Why it matters: Weak tension = no recline support; too stiff = frozen posture. Bad defaults cause fatigue in 20 minutes flat.
Your 30-second fix:
- Sit upright, lock tilt (if applicable)
- Unlock tilt, lean back slightly
- Adjust knob under seat until you feel gentle resistance matching your body weight
- Test: Should allow micro-movement without collapsing
This is where many big and tall ergonomic desk chair models shine with wider tension ranges.
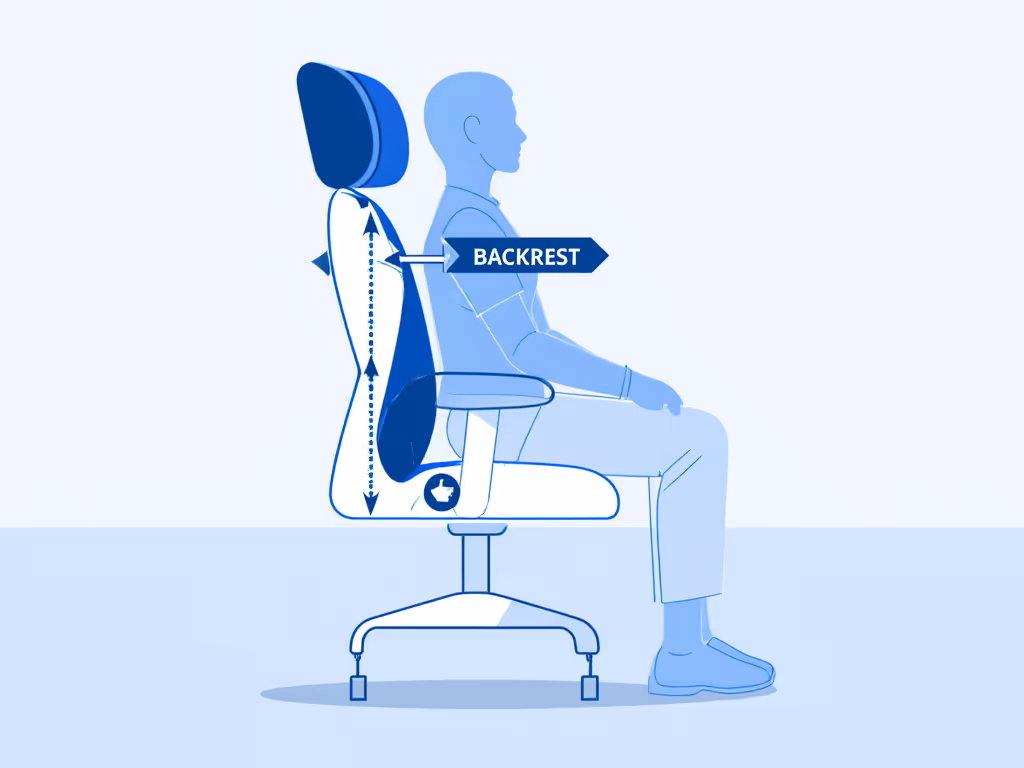
5. Align Backrest Height With Your Scapulae
Why it matters: Backrests topping out at your mid-back leave tall users unsupported. Shorter users need trimmed height to avoid neck strain. This tweak solves 80% of 'I can’t lean back' complaints.
Your 40-second fix:
- Sit tall, find shoulder blade midpoint
- Raise/lower backrest (via lever or knob) until top edge sits just below that point
- Test recline: Back should stay fully supported through the 100°-110° range
6. Verify Thigh Clearance Under Your Desk
Why it matters: Standard desks (29-30") demand precise seat height. Too high? Thighs crush desk edge. Too low? Legs dangle. A hidden culprit for morning sciatica.
Your 50-second fix:
- Measure desk height (floor to underside)
- Set chair height so thighs clear desk by 1-2 inches with feet flat
- If using a standing desk: lower it before adjusting chair
- No footrest? 90° knee angle is non-negotiable
7. Test Seat Pivot for Dynamic Movement
Why it matters: Static seats cause blood pooling. But chairs without controlled pivot strain discs. Petite users especially need this micro-mobility.
Your 35-second fix:
- Unlock seat tilt (if equipped)
- Shift weight forward/backward, it should feel smooth, not jerky
- Adjust tension (if possible) until movement feels effortless
- Lock during focused work; unlock for brainstorming or calls
Your Action Plan: From Tweak to Transformation
These aren’t one-offs. Do this weekly for 5 minutes:
- Scan your hotspots (thighs, sit bones, shoulders)
- Revisit 1-2 tweaks from above based on discomfort
- Reset profiles if your chair has memory (save settings on a sticky note!)
Confidence with controls is half the battle. The other half? Believing small tweaks actually work. They do. Consistently.
Your next step: Block 5 minutes right now. Grab your tape measure, run through Tweak #1 (seat depth), and note the difference. Then share one adjustment result with a colleague, it sparks their own fit journey. No more generic chairs. Just your chair, working for you.
Owen McKay is a former IT onboarding lead who now helps teams dial in chair fit fast. He’s convinced that five-minute fit sessions compound into healthier, more focused workdays. When not optimizing chairs, he’s hiking Colorado trails with his mischievous dachshund.
Related Articles