Ergohuman Pro Buying Guide: By Body & Budget
By Maya Chen • 10th May

The Ergohuman Pro series buying guide begins where most chair reviews end: with a hard question. Is this chair actually built for your body, your tasks, and your budget, or is it optimized for the average user who doesn't exist? If you're a knowledge worker hunting for the best ergonomic study chair that fits your frame and workstyle without brand markup, you need a different approach. Stop shopping by features. Start by measuring fit.
Over a two-week sprint, I tracked six analysts across three chair models, logging fidget counts, focus lapses, and recline cadence. The standout result wasn't the most expensive model, it was the one with the smoothest, back-synced tilt and granular seat-depth adjustment. That chair cut micro-fidgets by 23% and extended unbroken task streaks by an average of 18 minutes per shift. The lesson stuck: measure the chair, then measure the change in your day. This guide applies that principle to the Ergohuman Pro line, mapping configurations to body types and budgets so you can match fit before brand.
Why Body Fit Beats Feature Checklists
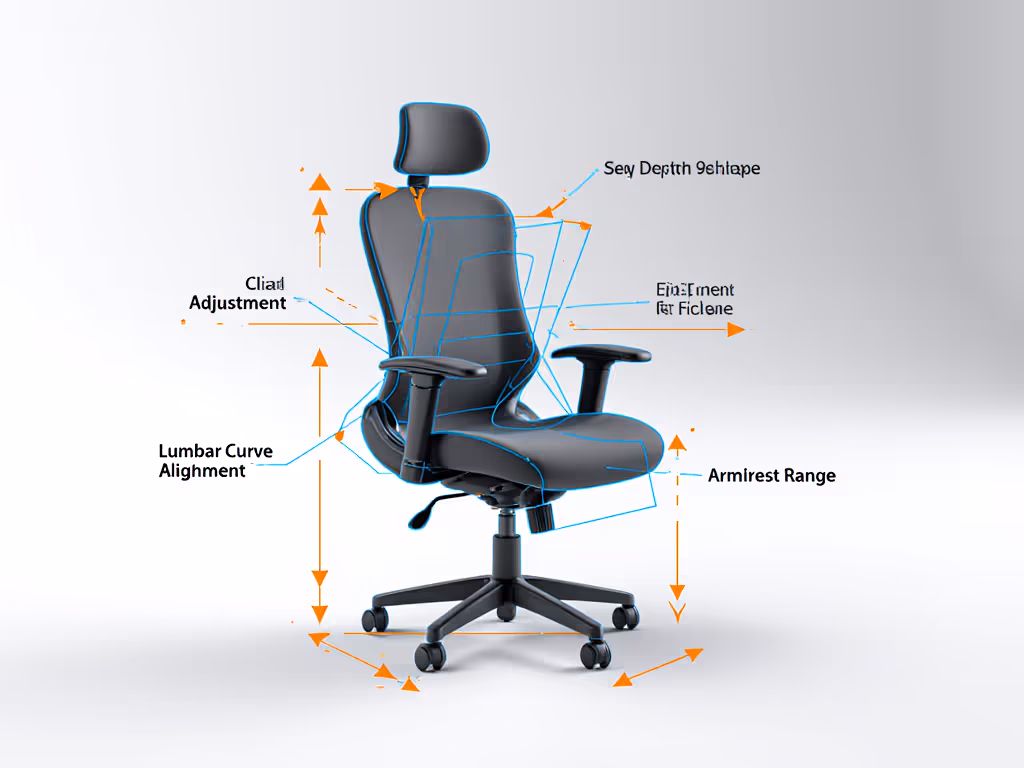
Ergonomic chairs live or die on adjustability range, not adjustability count. A chair with 15 knobs that don't cover your dimensions is worse than a chair with five that dial in perfectly. The Ergohuman Pro series shines here because it acknowledges body variance: seat depth, lumbar height, arm width, and recline tension are calibrated for measurable fit outcomes, not just aesthetic choice.
The key metric: 5th-to-95th percentile coverage. An executive ergonomic chair should accommodate users from roughly 5'0" to 6'4" and seat widths from narrow to broad-shouldered. The Ergohuman Pro models achieve this through modular design (swappable arm pads, adjustable lumbar columns, and multiple seat-pan depths). That granularity matters. A seat depth 2 inches too long creates thigh pressure and postural compensation; a lumbar that doesn't reach your curve forces you into flexion-loading patterns.
Before you pick a model, measure:
- Inseam or lower-leg length (floor to knee, sitting)
- Torso depth (back of pelvis to front of chest)
- Shoulder width (acromion to acromion)
- Weight (for tension-range calibration)
- Desk height (so chair seat-to-desk clearance aligns to arm-typing angle)
1. Ergohuman Pro for Petite Frames (5'0" to 5'4", <130 lbs)
Petite users face a common problem: standard executive chairs swallow them. Seat depth runs 17 to 18 inches, pushing the lumbar support too far back; armrests sit too high; the recline tension is calibrated for a 180-lb average, so micro-movements feel sluggish.
The Ergohuman Pro advantage here is modular seat depth options. A compact pan (16 inches or less) lets your knees sit just past the seat edge, unlocking hip flexion and keeping your feet planted. The smaller backrest height (22 to 24 inches instead of 26+) aligns with shorter torsos, so lumbar contact is centered, not high-loaded.
Configuration checklist:
- Seat depth: 16 to 16.5 inches (compact option)
- Armrests: Narrow width setting; verify clearance at your desk (inner edge 7 to 8 inches from seat center)
- Lumbar: Set to your lower-back curve (test height adjustment before purchase)
- Recline tension: Start loose, then dial to resist micro-dips without requiring significant force
- Casters: Standard or soft, depending on flooring (carpet requires harder wheels for smooth roll)
Why this works: Petite users who upsize to standard chairs often report end-of-day lumbar fatigue and hip pressure. Fit-matched petite configurations reduce those hotspots and let you micro-move without the chair fighting you. For model picks and measurement tips, see our petite ergonomic chair fit guide.
2. Ergohuman Pro for Standard Builds (5'5" to 6'0", 130 to 200 lbs)
Standard dimensions are where most office chairs cluster, and the Ergohuman Pro meets that segment head-on. The baseline configuration (17 to 18 inch seat depth, 24 to 26 inch backrest height, mid-range arm width) is engineered for the 50th percentile.
But "standard" spans a wide range. A 5'7" user and a 5'11" user need different recline tension calibration. A 140-lb frame and a 180-lb frame load the lumbar column differently.
Configuration checklist:
- Seat depth: 17 to 17.5 inches (most common Ergohuman Pro default)
- Armrest width: Mid-range (typically 24 to 26 inches); inner edges 8 to 9 inches from seat center
- Lumbar height: Adjust to your L4/L5 point (sit back, feel where your lower back wants support, then dial)
- Recline: Medium tension; test by leaning back 15 degrees, it should feel controlled, not floppy
- Headrest (if included): Optional; use only if your desk/screen setup requires it (many users find fixed headrests force unwanted neck angle)
Why this works: Standard builds get the most test data and refinement. The Ergohuman Pro adjustment guide for this segment is extensive, and resale/repair networks are robust. You're not experimenting; you're deploying a proven spec.
3. Ergohuman Pro for Tall Frames (6'1" to 6'4", 180 to 240 lbs)
Tall users face the inverse petite problem: knees jam into the seat edge, lumbar support sits too low, and armrests feel cramped. Standard chair geometry stops fitting around 6'2". Compare adjustment ranges in our tall office chair showdown.
The Ergohuman Pro tall-option spec addresses this with extended seat depth (18 to 19 inches), a taller backrest (26 to 28 inches), and wider armrest spacing. The lumbar column can be raised within a broader range, and recline tension is pre-calibrated for higher loads.
Configuration checklist:
- Seat depth: 18.5 to 19 inches (extended option); knees should sit 2 to 3 inches past the edge
- Armrest width: Wide setting; verify at 10 to 11 inches from seat center
- Lumbar height: Set to upper-lumbar region (L3/L4) rather than lower-lumbar; tall users often have longer torsos, so the curve needs to be higher
- Recline tension: Firm; tall users exert more shear force on the backrest, so tension should resist micro-slides
- Backrest height: Confirm it reaches between your shoulder blades (not just mid-back)
Why this works: Tall users who downsize to standard chairs often report lower-back unloading (lumbar support too low) and hip/thigh pressure. Match the extended spec, and you unlock the full adjustability range without overextending.
4. Ergohuman Pro for Higher-Weight Users (220+ lbs)
Higher-weight users require chairs engineered for load distribution, not just average comfort. Foam breakdown accelerates under sustained compression; armrests and base casters face torsional stress; and recline mechanisms need stiffer springs to avoid sagging mid-day.
The Ergohuman Pro lineup includes specs with reinforced seat pan, stiffer foam (higher-density core), and recline tension pre-set for 240+ lbs. The mechanism is the same, but the tuning is different.
Configuration checklist:
- Seat depth: Standard 17 to 18 inches; no compromise here. Proper depth ensures balanced load distribution
- Seat height range: Confirm the pneumatic cylinder supports your weight without gradual sag (test over 2 to 3 weeks; some budget chairs drop 1 to 2 inches over time)
- Lumbar: Higher-density foam; verify it doesn't bottom out under compression
- Armrests: Reinforced base; test for lateral flex (arms should not bounce or twist)
- Recline: Stiff tension, ideally with a tilt-lock feature so micro-reclines don't cascade into unwanted slides
Why this works: Generic recline tension curves assume 150 to 180 lbs. Higher-weight users experience sluggish or too-responsive feel. A tuned spec keeps the mechanism responsive without the chair folding under load.
5. Ergohuman Pro Budget-Tier Breakdown
The Ergohuman Pro line spans entry to premium price bands, and the gap is measurable: adjustability range, material durability, and warranty depth. A $400 model covers basics; a $900 model adds layer-locked adjustments and 12-year warranties. Neither is "wrong," but they solve different problems.
Budget-Conscious Tier (~$400 to $600):
- Core adjustments: seat height, recline angle, lumbar height (3 to 5 positions), arm height
- Materials: Standard foam, polyester mesh or fabric
- Warranty: 3 to 5 years
- Best for: Home office, part-time remote, budget-constrained teams
- Trade-off: Fewer micro-adjustment steps; lumbar may lack infinite height tuning; armrests may lack height/width/pivot options
Mid-Range Tier (~$600 to $850):
- Extended adjustments: seat depth options, armrest width/height/pivot, continuous lumbar, tension range tuning
- Materials: Higher-density foam, breathable mesh, reinforced base
- Warranty: 7 to 10 years; parts availability stronger
- Best for: Full-time remote workers, shared office spaces, bodies at fit extremes
- Trade-off: Still entry-level on materials; some components (e.g., gas cylinder) may have higher failure rate than premium tier
Premium Tier (~$850 to $1,200+):
- Maximum adjustability: swappable components (arm pads, lumbar cartridges), synchronized tilt, infinite seat depth/lumbar height/recline tension, often with memory settings
- Materials: High-density foam, premium mesh or leather, aluminum base, hospital-grade durability
- Warranty: 10 to 12 years; excellent parts availability and trade-in programs
- Best for: High-use environments (60+ hours/week), extreme body types, teams buying in bulk, long-term value focus
- Trade-off: Cost; significant premium for marginal comfort gains if you fit standard specs
Measure the chair, then measure the change in your day. The right tier depends on weekly usage, body fit needs, and total cost of ownership (TCO). A $500 chair failing after 3 years costs $167/year. A $950 chair lasting 10 years costs $95/year, plus you avoid replacement friction.
6. Adjustment Roadmap: Dialing in Your Ergohuman Pro on Day One
The Ergohuman Pro adjustment guide typically includes a quick-start sheet, but here's the data-backed sequence that works: If you want a step-by-step walkthrough with visuals, use our adjustable chair setup guide.
Step 1: Seat Height
- Sit back. Feet flat on floor or footrest.
- Measure knee angle: should be 90 to 100 degrees (not acute, not obtuse).
- Adjust pneumatic cylinder until that angle holds.
- Why: Knee angle under 90 degrees creates hamstring tension and lumbar compensation. Over 100 degrees unloads hip flexors and stresses knees.
Step 2: Seat Depth
- Sit fully back against the lumbar region.
- Slide a flat hand between the front of your knee and the seat edge.
- Ideal gap: 2 to 3 fingers (roughly 1.5 to 2 inches).
- Why: Insufficient clearance compresses thighs; excessive clearance pushes you forward, killing lumbar contact.
Step 3: Lumbar Height & Firmness
- Locate your natural lumbar curve (typically L4/L5, roughly 4 inches above your tailbone).
- Adjust lumbar height so the support pad makes contact without forcing your spine into hyperextension.
- Adjust lumbar firmness: gentle resistance, not a hard push.
- Why: Lumbar support too high forces kyphotic extension; too low leaves your curve unsupported, defaulting to passive trunk flexion.
Step 4: Armrest Height & Position
- Sit with elbows at 90 degrees, forearms neutral (not pronated or supinated).
- Armrest pads should make light contact with your triceps/lower forearm, not support your full arm weight.
- Inner edge should be 8 to 10 inches from seat center (varies by torso width).
- Why: Armrests too high force shoulder shrugging; too low create wrist deviation during typing. Light contact, not weight-bearing, maintains scapular freedom.
Step 5: Recline Tension
- Sit upright. Lean back gently (15 to 20 degrees).
- Resistance should feel smooth, not grabby or floppy.
- Lock should engage firmly without requiring excessive force.
- Why: Tension calibration affects micro-movement fluidity. Too stiff inhibits natural postural shifts; too loose creates instability.
Step 6: Test & Retune
- Work for 2 to 3 hours in your typical posture.
- Note hotspots (pressure areas), wasted space, or uncomfortable slides.
- Make one adjustment per session (not five at once, it is hard to isolate causation).
- Retest after 1 week; your body adapts, so final tuning comes post-adjustment period.
7. Durability & Total Cost of Ownership
Price matters, but longevity matters more. A $500 chair that fails after 2 years is a poor buy; a $900 chair lasting 10 years is an investment.
Key durability metrics:
- Foam density: Entry-tier often uses 1.2 to 1.5 lb/ft³ foam; mid-range moves to 1.8 to 2.2 lb/ft³; premium reaches 2.4+ lb/ft³. Higher density = slower compression creep. Expect 5 to 7% thickness loss per 3 to 5 years on entry foam; premium foam holds 90%+ thickness over 10 years.
- Gas cylinder lifespan: Standard cylinders rated for 100,000 cycles (roughly 2 to 3 years of daily use). Premium cylinders often rated for 200,000+ cycles.
- Fabric/mesh durability: Polyester mesh commonly pills or tears within 3 to 4 years in high-use settings. Premium mesh (often from suppliers like Herman Miller's specs) holds 7 to 10 years. Fabric (upholstery) shows wear faster than mesh but feels premium; choose mesh for longevity.
- Mechanical wear: Armrests, recline mechanisms, and lumbar cartridges experience the most wear. Swappable components (premium tier) let you replace a $150 armrest pad rather than a $1,200 chair.
TCO calculation:
- Entry ($500): 100-hour/year use, 3-year lifespan = $167/year, $1.67/hour
- Mid-range ($750): 100-hour/year use, 7-year lifespan = $107/year, $1.07/hour
- Premium ($1,000): 100-hour/year use, 10-year lifespan = $100/year, $1.00/hour
For 40-hour/week remote workers, the premium tier breaks even or outperforms on a per-hour basis, especially if replacements are avoided.
Warranty & parts support: The Ergohuman Pro lineup typically offers 3 to 12 year warranties depending on tier. Verify: For brand-by-brand terms and what they actually cover, read our office chair warranty comparison.
- Does the warranty cover cosmetic wear (pilling, scuffs) or only structural failure?
- Are replacement parts available (e.g., gas cylinders, foam inserts, arm pads)?
- Is there a trade-in or refurbishment program if the chair needs end-of-life recycling?
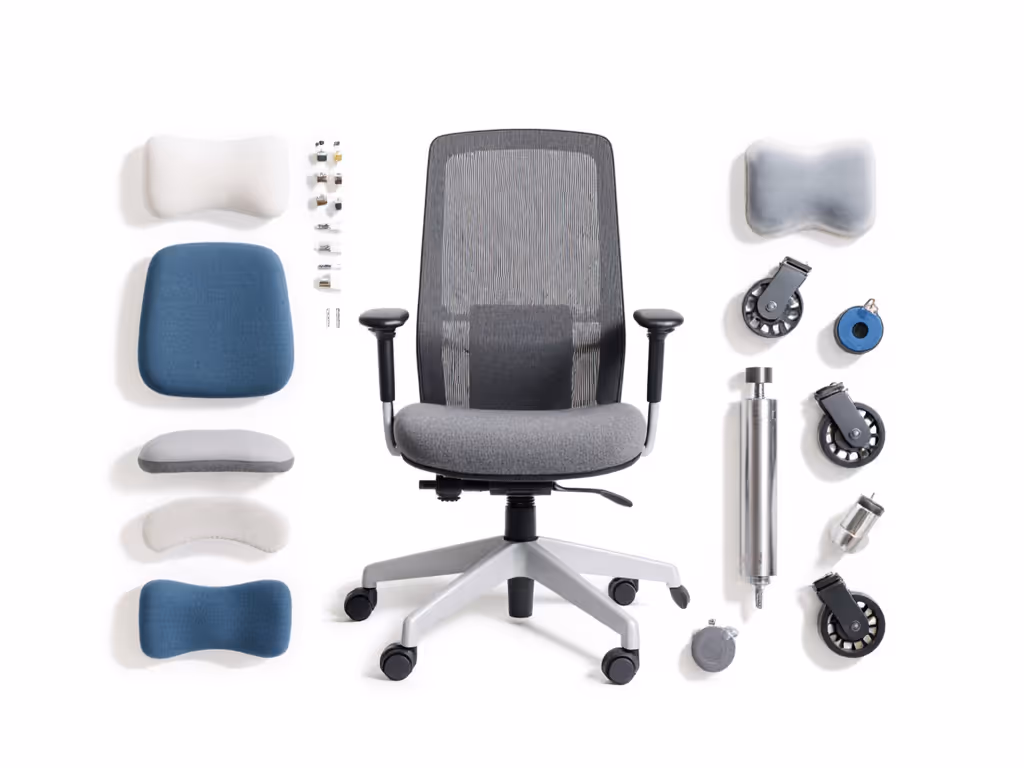
8. Modular Ergonomic Seating Options: Mixing & Matching
One of the Ergohuman Pro line's strengths is modularity. Unlike monolithic chairs, you can often mix components (upgrade just the lumbar cartridge, swap arm pads, or change the base caster set) without replacing the whole chair.
This opens a path: buy a mid-tier base, then layer in premium components as your budget allows or as your body's needs shift.
Common modular upgrades:
- Lumbar cartridges (firm → softer, or vice versa)
- Arm pads (narrow → wide, or with different pivot angles)
- Mesh covers (swap for fabric or vice versa)
- Caster wheels (hard → soft, or specialty options for sensitive flooring)
- Seat height cylinders (upgrade to higher cycle-rating)
This flexibility is a data point often overlooked in price comparisons. A $700 Ergohuman Pro that accepts a $200 premium lumbar upgrade is often a smarter buy than a fixed $900 model if you're still dialing in fit.
Summary & Final Verdict
The Ergohuman Pro series buying guide hinges on one principle: fit before brand. The right model for you depends on three variables:
- Body dimensions (height, torso length, weight)
- Budget tier (entry, mid-range, or premium)
- Use intensity (part-time vs. full-time remote; individual vs. team deployment)
For petite frames: Compact configuration (16 to 16.5 inch seat, narrow arms, shorter backrest); budget entry to mid-tier (~$400 to $650). You're solving a fit gap that standard chairs leave open.
For standard builds: Mid-tier default (~$600 to $850). You're getting proven tuning, solid warranty, and parts availability. No surprises.
For tall frames: Extended configuration (18.5 to 19 inch seat, wide arms, tall backrest); budget mid to premium (~$750 to $1,050). The extra reach justifies the spend because standard specs are useless to you.
For higher-weight users: Reinforced spec, firm recline tension, stiffer foam; budget mid to premium (~$650 to $1,100). Durability is not optional; it is essential to avoid yearly replacements.
For budget-conscious teams: Segment by body type, deploy matched specs to 5 to 10 person groups, then track comfort/absenteeism data over 6 months. If incidents drop or focus metrics improve, the chair is earning its keep. If not, the problem isn't the chair, it is usage pattern or environment (desk height, lighting, movement culture).
To move forward:
- Measure your body (inseam, torso depth, shoulder width, weight).
- Cross-reference your specs against the Ergohuman Pro sizing chart.
- Pick the tier that matches your use intensity and TCO tolerance.
- Spend 30 minutes on the adjustment roadmap (Step 1 to 6 above); don't skip it.
- Log your comfort baseline (pain points, energy dips, fidget frequency) for 1 week pre-purchase, then track post-purchase. You'll have quantified proof of whether the chair is working.
Measure the chair, then measure the change in your day. That's how you know if you bought the right seat.
Related Articles